SELLmatix Software Basic Guides
"If at first you don't succeed, don't take up skydiving."
`
Stuck? Question?
Name
Reply to Email
Enter Your Question Here
Links on this Page
SELLmatix POS Basic Guide
SELLmatix Control Basic Guide
Your First Sale
 

SELLmatix POS Overview
There are an infinite number of different was that SELLmatix POS can be configured. This means that virtually any Point of Sale requirement can be met by SELLmatix, however it also means that the appearance and manner in which the system is configured will largely determine how it operates. This tutorial is designed to give an overview so that you can learn to navigate around the system and learn the possibilities for setting up SELLmatix to meet your unique requirements.

When SELLmatix is run, an initial display screen appears. On the standard sample configuration, it looks something like this:-

SELLmatix Sample Start Screen
Status Display
To the right of the display are five areas which show information about the sale being processed.

  • Area A
    Shows the sale header information. This can be configured to show different information.
  • Area B
    shows the details of items on the sale being processed.
  • Area C
    shows four different Tabs allowing you to process 4 different sales at the same time. If, for example, a customer goes back into the store to get other items they have forgotten, you can click on another tab and process sales for another customer. When the first customer returns to the checkout, you just click back on their tab and resume processing where you left off. When items appear on a sale tab, the subtotal for that sale is shown on the tab.
  • Area D
    Shows input you have entered into the system but which has not yet been processed.
  • Area E
    Shows POS system status information.
Control Buttons
To the left of the screen are a series of buttons which you use to control the POS, by touching them if you have a touch screen, or else by clicking on those buttons with the mouse. Many of the functions can also be activated by pressing keys on the keyboard.

These buttons can be configured to perform any function is SELLmatix. In many cases, there are more functions that will be required for the POS system than will fit on one screen. SELLmatix can use any number of different display screens, and where there is one screen, there needs to be a way to navigate between the screens. It is usually a good idea to have navigation buttons in the same place on each screen, because this saves the operator from needing to "hunt" for the correct buttons.

This sample configuration has the navigation buttons located at the top of the button area on each screen in dark blue. Touching (or clicking on) the "Payment Screen" button changes the display to the following screen.

SELLmatix Sample Payment Screen
It is good practice to group similar functions on the one screen, and this sample screen has a number of functions related to finalising a sale.

The Navigation buttons appear in the same place at the top of the display, and touching (or clicking) the Main screen button takes you back to the previously displayed main screen, or clicking on the "Input Screen" button results in the following screen being displayed.

SELLmatix Sample Input Screen
The input screen is used for performing functions which are not normally required in every sale, and it includes an on screen keyboard so that on systems which do have a touch screen, but do not have a keyboard, text can be entered.

All of the above screens show SELLmatix POS operating in Point of Sale Mode. Menu mode is another mode which is used for configuring the Point of Sale and performing maintenance functions. On is sample configuration, you can switch to Menu Mode by clicking (or touching) the appropriate button on the Input Screen. In Menu Mode, SELLmatix POS operates as a normal Windows program where various configuration options are set. You can return to POS Mode by going to the File Menu and Choosing "Process Sales":-

SELLmatix Sample Menu Mode
Take a few minutes now to practice navigation between the various screens on the sample configuration so that you know how to move about the POS display and switch to Menu Mode and back to POS Mode.

Back to top

SELLmatix Control Overview
SELLmatix Control has three main functions.
  • updating masterfiles such as products departments, customers and clerks.
  • controlling up to 64 POS terminals, keeping their data files current, and retrieving transactions. This is handled through the SELLmatix Control Connection Manager.
  • printing orders on kitchen printers and bar printers when operating in a restaurant environment. This is handled through the SELLmatix Control Order Manager.
  • exporting data and transactions so that they data can be used in a range of other applications such as accounting programs, spreadsheets etc.
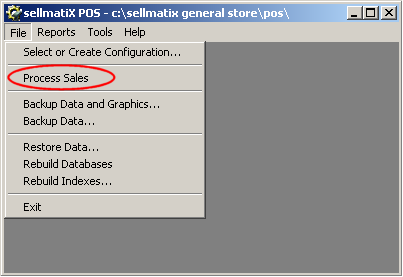
The main SELLmatix Control Window appears as follows:-

SELLmatix Control Main Screen
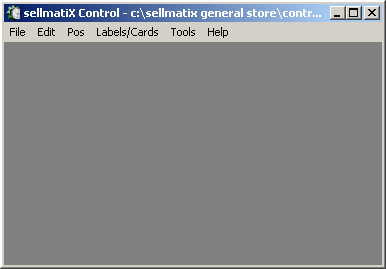
The menu provides options to import/export data, backup and restore, modify data files, print shelf labels, customer and clerk cards and configure the system.

The SELLmatix Control Connection Manager appears as follows:-

SELLmatix Control Connection Manager
Connection Manager must be running whenever Control needs to communicate with POS terminals. An entry in Connection Manager must be set up for each POS terminal with which Connection Manager communicates. In this case, two systems are set up. The POS terminals can be identified by either a computer name which can be resolved by name resolution, or an IP address. The name "localhost" is a specially reserved name meaning "this" computer. If you are going to run both SELLmatix Control and SELLmatix POS on the same computer so that sales can be processed on that machine as well as having control run in the background, then we recommend that you use the name "localhost" rather than the actual computer name. You could also use the local loopback IP Address, which is 127.0.0.1

You will notice that the "Status" of the localhost machine in this case shows "Refused". This means that this computer is responding however there is no program running that will accept a connection from Control. This is correct, because SELLmatix POS was not running at the time this screen shot was taken. You will also notice, that every few seconds this changes to "Connecting" as SELLmatix Control attempts to connect again.

The other terminal shown in this screenshot is identified by an IP Address. The status indicates that this computer is Online and the Task area shows the most recent activity between SELLmatix Control and that terminal. If you watch this display you will see that the Task constantly changes as SELLmatix Control constantly checks for updates to and from the POS terminal that need to be made. When this screenshot was taken, a Pocket PC running SELLmatix PocketPos was available over a WiFI connection, and SELLmatix Control had connected to and was controlling that POS terminal.

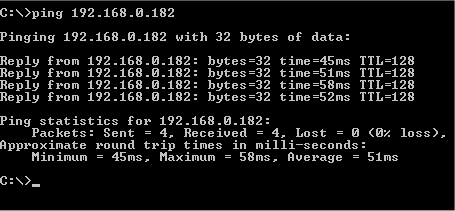
SELLmatix Control can communicate with any POS terminal anywhere, provided that terminal can be communicated with over a TCP/IP connection. If you are setting up network connections, then to test if the terminal can be contacted, use the ping command.

Using PING to test connection
Network connections can be unreliable, particularly in the case of WiFi connections with a PocketPC where the terminal may move out of radio range, or simple loss of signal through atmospheric conditions.

SELLmatix Control is designed to handle such situations automatically. The POS terminals can continue to operate while the connection is broken, and SELLmatix Control automatically restores the connection as soon as it can and resumes communication where it left off. Orders taken on a Pocket PC while it is out of range, are stored on the PocketPC until it comes back in range when they are automatically retrieved by Control and printed on kitchen printers. This process is typically faster than a waiter manually taking an order back to the kitchen.

Please Note
If network name resolution services fail, this will significantly degrade the performance of SELLmatix control. If this happens then it is likely to be because an invalid name has been entered for one or more of the machines in Connection Manager which cannot be resolved, or else that network services have failed. Using static IP addresses avoids this problem as they do not require name resolution.

SELLmatix Control Order Manager
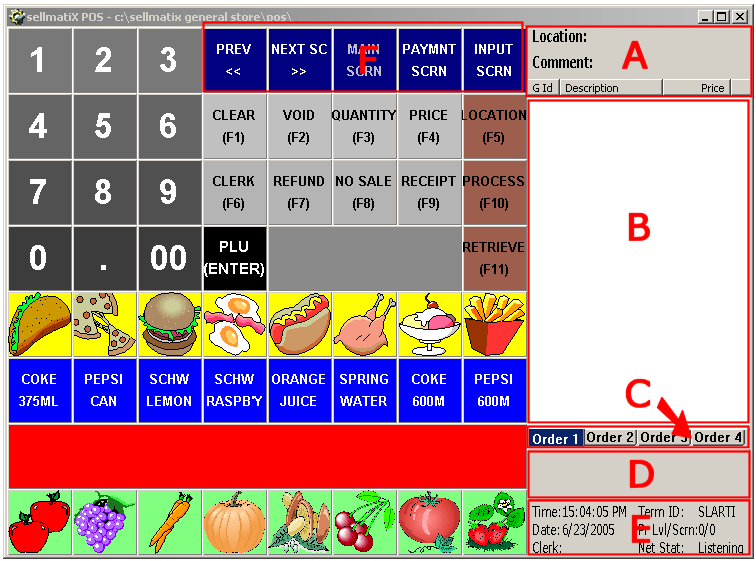
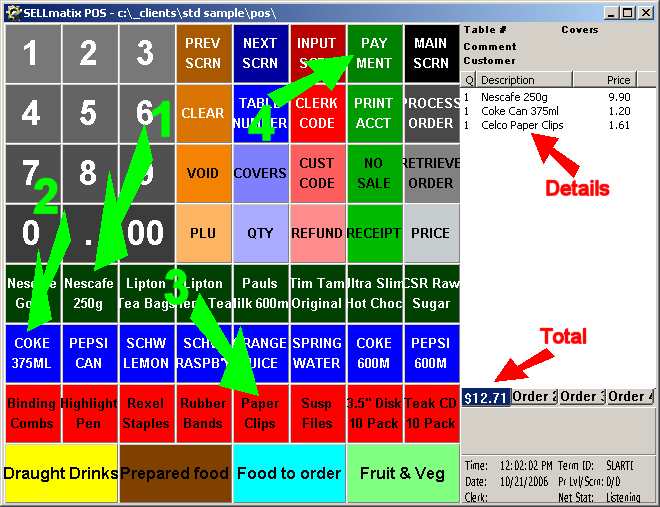
The SELLmatix Control Order Manager can used a restaurant or food service or bar environment, where one or more orders is taken from a customer, product prepared and supplied to the customer, and then payment is taken later for all items supplied to that customer.

In such cases, the orders are entered into a fixed location POS system, or Pocket PC running PocketPos, but instead of processing payment for the sale, the operator enters a Location Number, and then Processes the Order. SELLmatix Control retrieves the order via Connection Manager, prints the orders (where required) on various kitchen or bar printers, and then stores the order in Order Manager.

Order Manager displays a list of all orders that have been taken and not yet completed. The location number would normally be a table number in a restaurant, but could be a location at the bar, or some other data to identify that customer.

When the customer orders additional items, these new orders can be entered from any POS or PocketPos terminal, and the new order is added to the customer's total. 
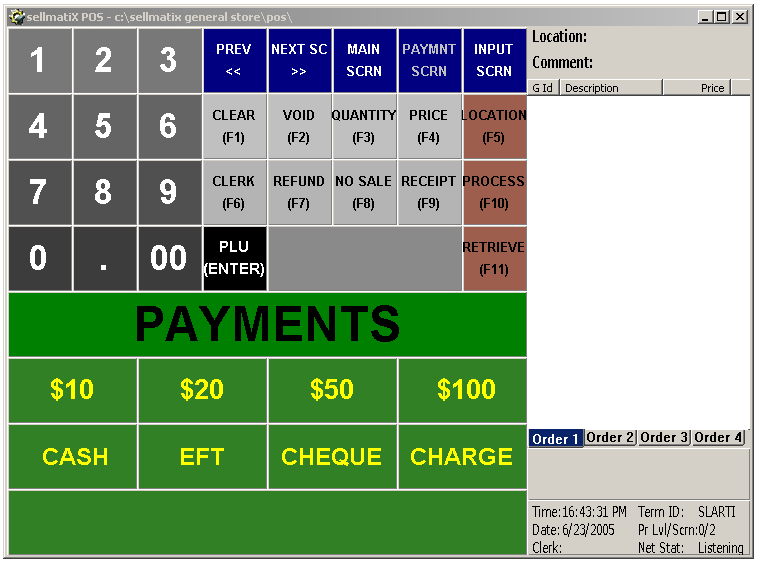
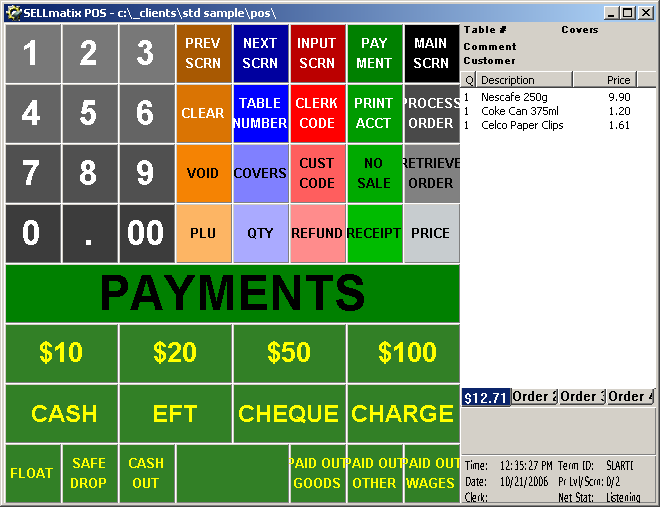
When the customer asks for their bill, it can be printed out by request from any of the POS or PocketPos terminals, and when payment is ready to be processed, one of the POS systems Retrieves the order from the SELLmatix Control Order Manager and processes the payment.

When a POS terminal retrieves an order, it is automatically removed from Order Manager, and the sale, along with the payment appears in the Z-Read and audit trail for the terminal where payment was processed.

Back to top

Processing Your First Sale
Processing sales on SELLmatix is easy. Say, for example, that your start screen appears as follows, click your left mouse button where each of the green arrows are pointing. If you have a touch screen, just touch the screen where the arrows are pointing.

Processing Your First Sale
As you touch, or click these buttons, you will see the details of the sale updated to the right, and the total displayed toward the bottom right. If you have a barcode scanner, then instead of touching these buttons, you would just scan the barcode.

Now, lets process the payment. Click, or touch on the "Payment" button, and the following screen will appear.

Payment on Your First Sale
Click, or touch the $20 button. You are done!

Of course there are many configuration options you can set up, and many advanced features that you can use. But this covers the basic type of operation of SELLmatix.

  • Each operation requires the minimum number of keystrokes or "touches" to the touch screen. which means that you can process sales much faster than with other systems.
  • The sequence of operation is very similar to a cash register, so you do not need specially trained staff to operate the system.
  • The screen prompts on the Touch buttons can be color coded, contain descriptive text or even images to make it easy to navigate around. This makes operation much easier than using a POS keyboard with multiple shift levels where only a very limited amount of information can be displayed on each key cap.
Take a few moments now to play with the system, navigate around and get a feel for how it works. Once you have a feel for the basic way that the system works, you can refer to Complete POS Operations for details on more advanced features.

If you haven't already done so, why not activate SELLmatix now and start enjoying the benefits of the system now. With SELLmatix, you don't have to pay for everything up front. You can implement the system in stages adding parts as you go from the savings you make. As little as $30 gets you started. No risk. No long term commitment. Activate Now!

Back to top